

How To Create A Logo In Lightroom 5
Before digital photography, a contact sheet was a quick way to preview all the images from a roll of film.
You would print a contact sheet and decide which images you wanted to print in a larger format.
In fact, the Grid view in Lightroom is modelled after a contact sheet.
Contact sheets are a very useful way to show clients or photo editors a selection of multiple images.
You can also use this function to create layouts of your photos. You can use these for marketing documents and other purposes.
It's easy to make a contact sheet in Lightroom's Print module.
Once you have created a contact sheet, you can print a hard copy or create a JPEG or convert it to a PDF.
Step 1: How to Choose Images for a Contact Sheet
To get started creating a contact sheet, you need to choose the photos that you want to include on the contact sheet.
You can choose images that you have in a folder, or saved as a Smart Collection. You can even use certain search criteria in Lightroom.
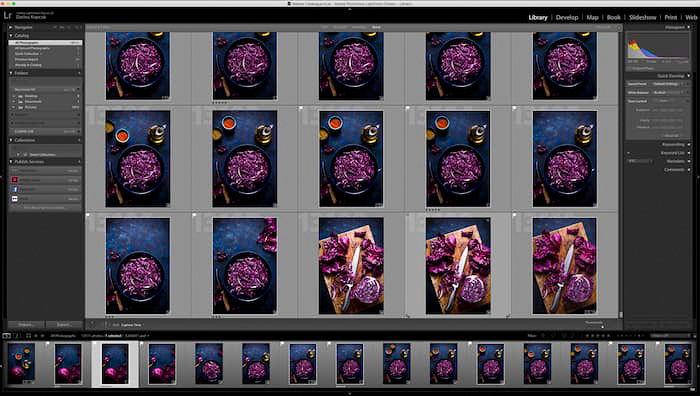
When you are in the Library module, click on G for Grid View.
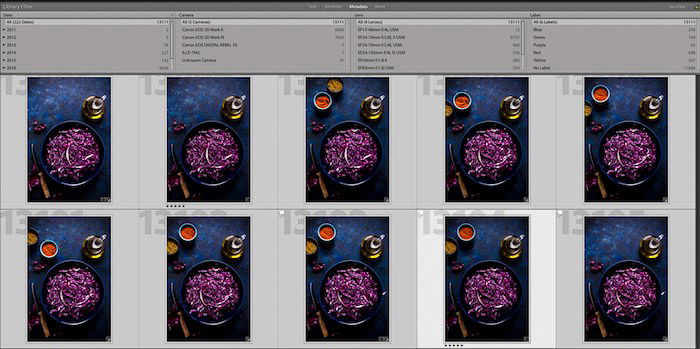
At the top of the panel you can choose the parameters by which you want to search. You can search by Text, Attribute, or Metadata.
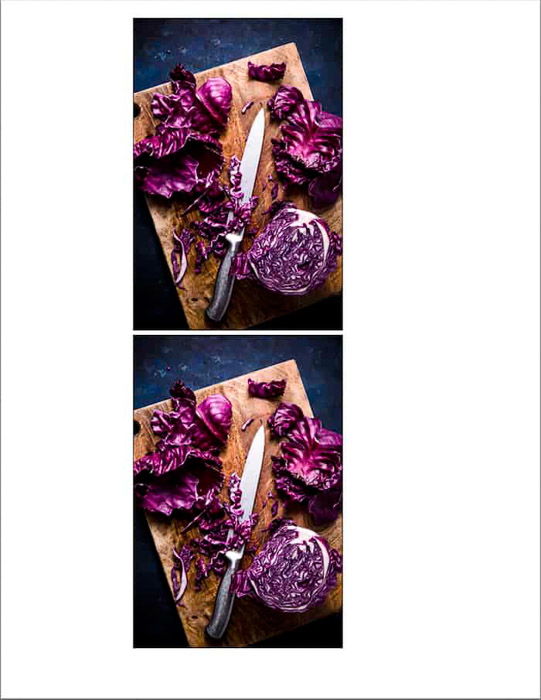
For example, I searched for all the images I had with the key word "cabbage" in the metadata.
I recommend that when you upload or edit your images, you always input a few key words. This will help you find certain types of images at a later date.
You can also search by date, camera, lens, and many other options from a series of drop-down menus at the top of the panel.
Step 2: How to Choose Your Template
Once you have chosen your images, switch from the Library module to the Print module. To do this, hitAlt+Cmd+6 (Mac) or Alt+Ctrl+6 (Windows).
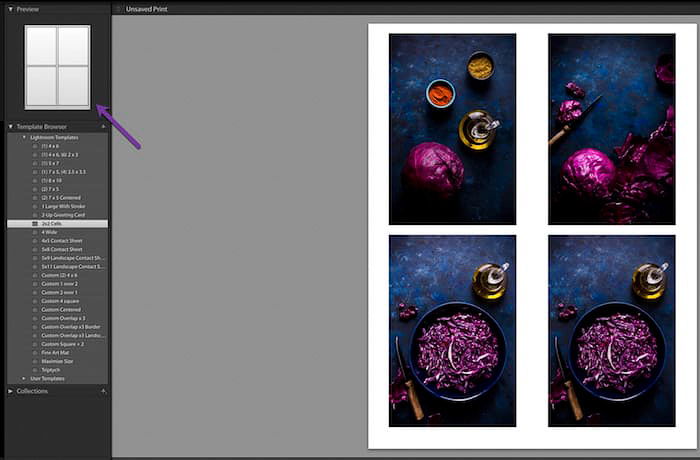
In the print module, you'll see the Template Browser panel on the far left of your Lightroom workspace.
Click the small triangle next to the panel title to expand it.
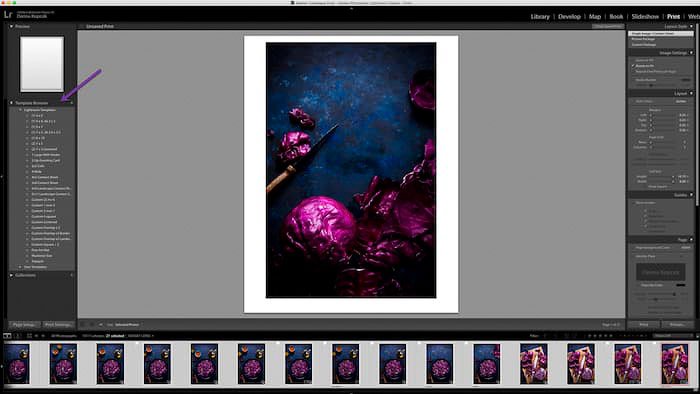
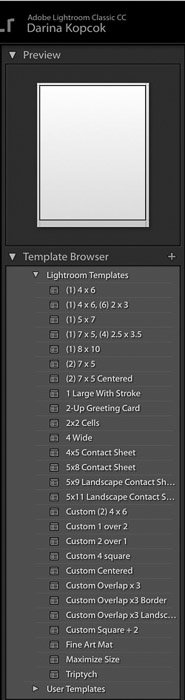
These Lightroom templates come with the program.
You can also create your own custom templates and save them as User Templates. These will appear in the section underneath the Lightroom Templates in the panel.
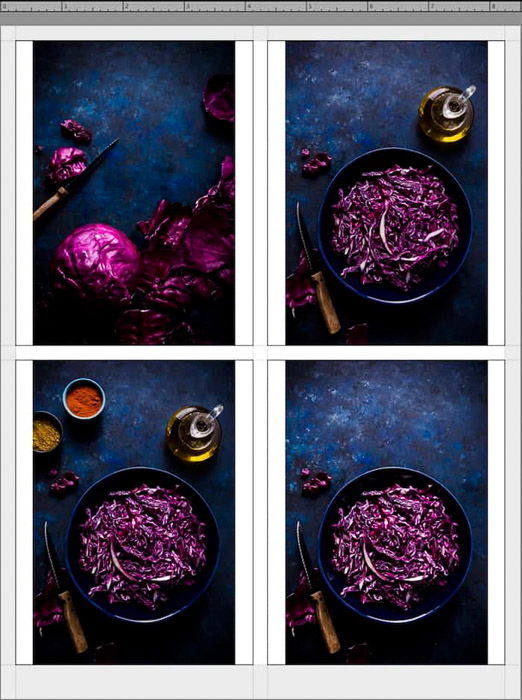
Lightroom gives you several options for different sizes of contact sheets. For example, a 4×4 contact sheet or 5×9 contact sheet etc.
This actually doesn't refer to the size of the print but to the number of columns and rows in the contact sheet.
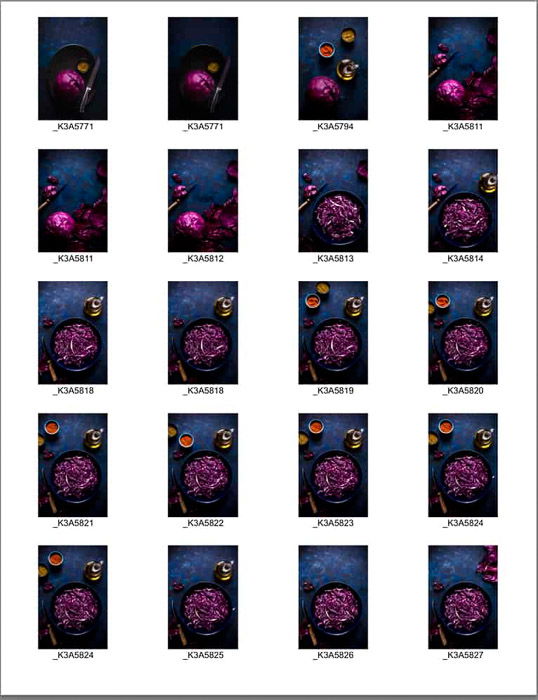
In the image above I have chosen 4×6, so I have 4 columns and 6 rows of images.
Keep in mind that a "landscape" template will be best suited to landscape-oriented images.
Also, note that Lightroom shows you a preview of layout of the template. You can see this in the Preview panel, right above the Template Browser.
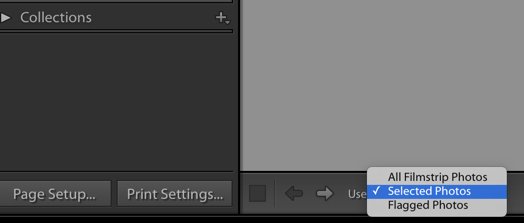
You can control which images appear in the contact sheet. Choose an option from the drop-down menu on the toolbar. This is right above the bottom filmstrip.
If the toolbar is not visible, hit T.
I have chosen Selected Photos for control over the images I want on the contact sheet.
If one image in the filmstrip is selected, then only that image will be displayed on the contact sheet. You need to select all the images in the filmstrip and add them to the contact sheet.
Click on the first image and then Shift + click on the last image, or select All Film Strip Photos under Use: in the toolbar.
You can also select flagged images.
You can also customise the template sheets. You can adjust the maximum cell width and size. And you can decrease the number of rows and columns. This increases the overall cell size.
You can change the paper size of your print and still keep the number of rows and columns you have selected.
If you choose more images than the template can accommodate, then the images will roll over onto another page.
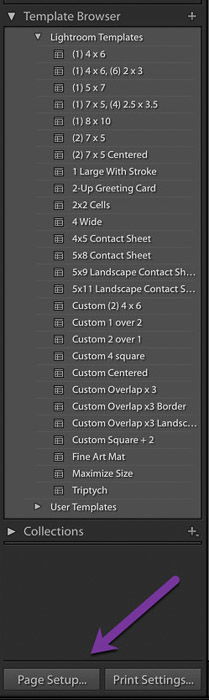
Click on the Page Setup button at the bottom of the template panel. Select the paper size you would like to print your Lightroom contact sheet on.
I usually choose Letter Size.
Step 3: How to Decide on the Image Layout
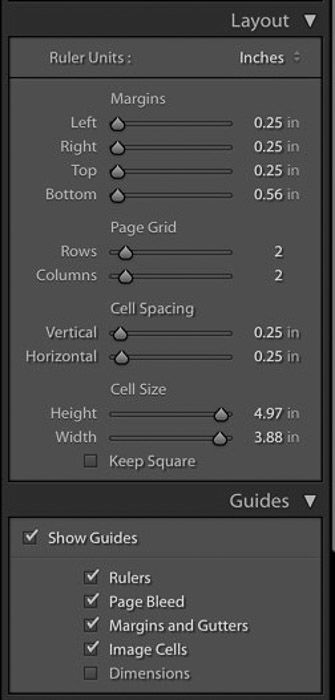
On the right panel of the Lightroom workspace, you have tools to adjust the settings for your contact sheet. This includes layout and page styles.
In the top panel under layout style, choose Single Image/Contact Sheet.
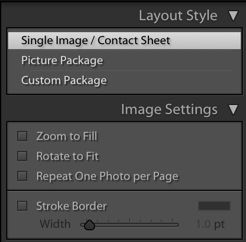
Then you have some options for Image Settings:
If you use Zoom to Fill, Lightroom will zoom in to fill in the space. This can end up cropping your images into a square and cut off a part of the image. Because my images were in portrait orientation, I left this unchecked.
Rotate to Fit will rotate images shot in portrait orientation into landscape orientation. This is if you are using one of the landscape orientation templates.
Stroke Border adds a line around each thumbnail. Notice that is is added to the edges of the images and not around the image itself.
Notice that you can control the width of the photo borders as well.
Margins refers to the margin around the page, not the margin around each thumbnail.
Page Grid is where you can change the number of columns and rows that you would like to appear on your contact sheet.
Cell Spacing controls the spaces between each thumbnail.
Step 4: How to Customize the Image Settings
Lightroom gives you a lot of options to customize your contact sheet.
The Guides panel contains rulers and grid guides to further help you with your layout. You can add a bleed to the page or add margins and gutters.
These will only appear in Lightroom, not on the final contact sheet itself. They are only meant to serve as a guide.
In the Page panel, you can select the colour of the background of the contact sheet. It is set to white as default, but you can choose black or another colour.
If you have text under the thumbnails, for example the image number, Lightroom will adjust it to be legible. Some text and background colour combinations can be hard to read.
Another cool feature in this panel is the Identity Plate.
This is where you can upload your logo to personalize your contact sheet. This is a great feature to use when you are creating marketing material.
It also adds a professional touch to any images that you are sending to clients.
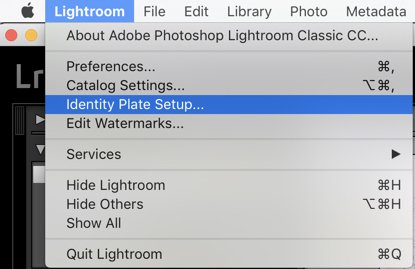
Lightroom also has this feature in the dropdown under Lightroom at the top left of your screen.
Go up to Lightroom and choose Identity Plate Setup to upload your logo file.
To use this feature in the Print module, click on Identity Plate in the Page panel.
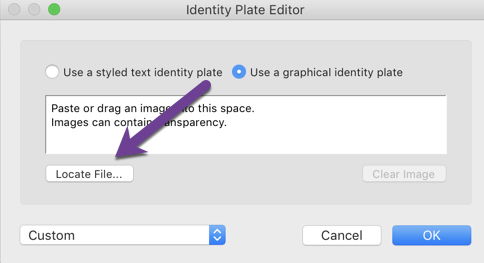
To upload your own logo, click on the identity plate and click on Edit from the dropdown menu.

Click Use a Graphical Identity Plate and then Locate File.
Locate the file on your computer and upload it to Lightroom.
Your logo will appear on the contact sheet.
You can drag it around your canvas to place it wherever you like.

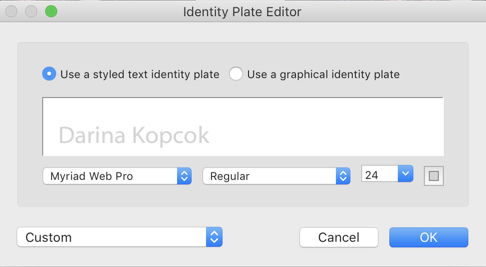
If you don't have a log, there is a default you can use and customize for an identity plate.
Click on Use A Styled Text Identity Plate.
Underneath where your name appears, you can choose the font and font size.
Hit OK.
You can also Watermark your contact sheets in the Page panel.
You can chose Copyright from the drop-down for your name with a copyright symbol. Or you can create or upload your own.
This will apply a watermark to each thumbnail.
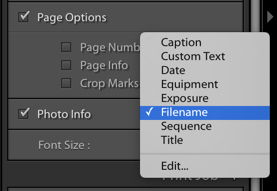
Under Page Options you can add a page number to the bottom of each contact sheet if you have several.
Photo Info offers a series of presets of information like filename, date, or caption.
You can choose Sequence to number every image.
If you are using Text, you can select the font size.
Make sure that the text size is compatible with the size of each image in the Lightroom contact sheet. The thumbnail will adjust according to the scale of the text.
You don't want to end up with long captions and tiny images!
Step 5: Print or Convert Your Contact Sheet
The last step is to print your contact sheet or save it as a JPEG or PDF.
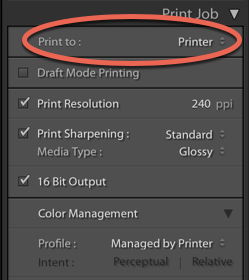
In the Print Job panel, select Print To: and choose Printer.
Be sure your printer is set up with the proper size of paper to match your canvas. For example the letter size I used in my examples.
To save your contact sheet as a JPEG file, follow the same steps. Choose JPEG File instead of Printer in the Print Job panel.
You will notice that Lightroom does not offer the option to print a PDF.
The workaround for this is to save it as a JPEG and then convert it to a PDF with an app like Small PDF.
This is an app that can compress PDF documents or convert all sorts of files to a PDF. You upload the file and the program will convert it for you. It's easy to use and it is free.
Conclusion
If you have not utilized the Print module in Lightroom before, spend some time playing around with it. Try the print templates or customize your own.
It's an excellent way to create a PDF of your latest work to show a prospective photo buyer. Or you can use it to check how your images will read in print. That is, before you undertake the expense of making large prints.
For more great Lightroom tips, check our articles on how to make and save a preset in Lightroom, or how to reduce noise in your images!
How To Create A Logo In Lightroom 5
Source: https://expertphotography.com/contact-sheet-lightroom/
Posted by: stewartfortalwyneho.blogspot.com
0 Response to "How To Create A Logo In Lightroom 5"
Post a Comment