

How To Create My Own Character
Create abstract characters
- Time needed 10-12 hours
- Skills-Create a composition from random characters-Add volume and depth-Use the Draw Inside mode
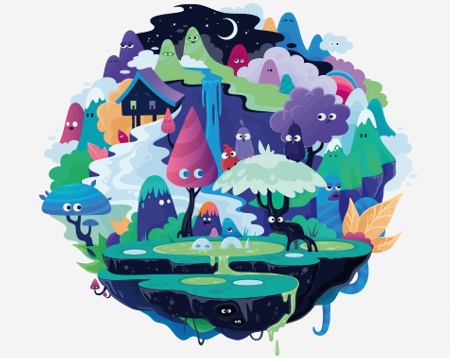
In this tutorial I'll explain how to make a composition from abstract elements and convert some of them into characters.
The abstract effect here is partially created by combining natural and imaginative elements, but you can choose any elements you like to make your composition.
I'll also demonstrate a number of different shading techniques that you can use in your own works to add depth. In addition, I'll share some general tips on composition and colouring that can be applied to a variety of different styles to add interest to your artwork.
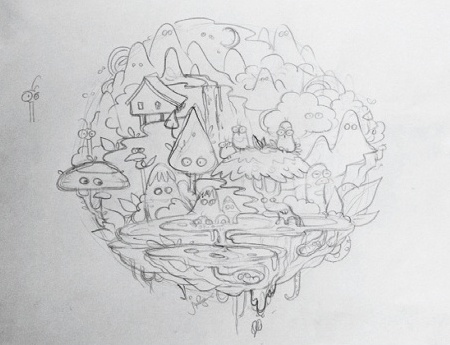
01 Start by drawing some random ideas in your sketchbook to help spark your inspiration. For this style of image, you can pull together elements from different sketches and combine them. Think about the whole composition and start sketching it out. For me, this step is the most difficult part of the overall process and I draw a lot of the detail before starting to work with vectors. It can save a lot of time in the future, when changing something will be more difficult.
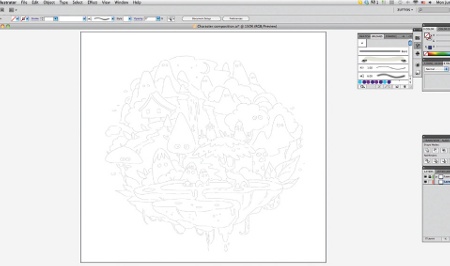
02 Scan your sketch, clean up the lines a bit, and place it in a new Illustrator document (File>Place). Make a new layer for the sketch, drop its Opacity to 50 per cent and lock it. Make sure this layer stays on top of any future layers, so you can easily access your initial concept. If you don't need it immediately, just hide it. Remember to create a new layer for each part of your illustration as you go.

03 I find that it's useful to define my colour palette before getting started. You can drag your chosen colours into the Swatch library, but I prefer to pick colours with the Eyedropper tool. Spend some time selecting your palette and then create some small, round shapes with the colours.
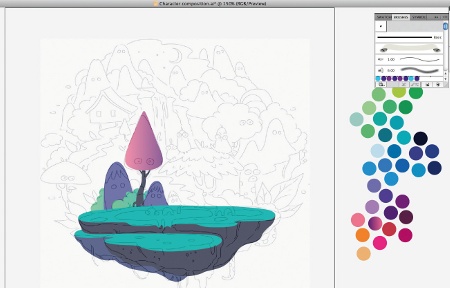
04 When you're comfortable with your palette, start converting all the major shapes in your composition into vectors with the Pen tool. Don't add any details; these will come later. When you're done, add some colour to gain a feel for your image. I spent a lot of time choosing different colour combinations for my larger elements. Having big blocks of colour is really important for the overall look of this kind of composition, but make sure that they're balanced.
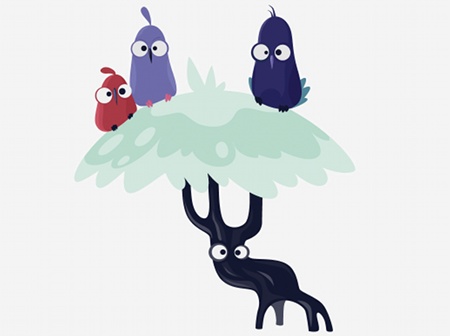
05 Now convert some elements of the image into characters: anything can be a character, you just need to attach bodily features or expressions to some of the shapes. Try to make your characters interact with the piece to bring some life to the image – even if two characters are simply looking at each other. Place all your creatures so that they fit naturally into the composition.

06 To help your characters take shape, add facial features – such as eyes and other small details. You can also copy similar elements (hold down Alt/Opt and drag with your mouse) and then change them a little using the Direct Selection tool to make each element more individual.
07 Let's now add some depth to the elements. This is a straightforward process, but can require a bit of time depending on how complex a result you want to achieve. I use a simple method: I select a shape, then draw areas of shadow and light with slightly darker and lighter tones. Create as much detail as you want for your image. Next, organise the elements into groups, and put the groups of objects onto different layers so that you don't get confused with all the small details.
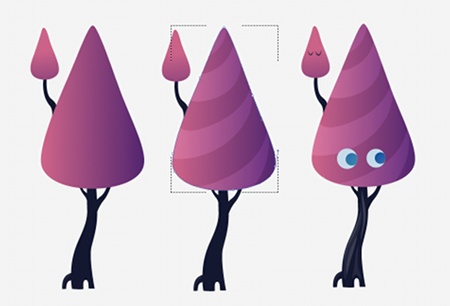
08 Another nice method to add depth and volume to a composition is through the use of gradients, Stylize effects and blending modes. Experiment with these and choose what works best for your own style – I usually use all of them together. For example, here I drew a cone shape and filled it with a two-colour linear gradient. I then selected the shape and chose the Draw Inside mode on the Tool panel. This let me draw inside the shape (just click twice outside the area you're working in to quit this mode).

09 Brushes are a great way to create a texture effect. Select a shape, and enter the Draw Inside mode. Select a Bristle brush and draw a line with a slightly different colour to the main shape. Then expand this (Object>Expand). Now you have a number of semi-transparent shapes. Distribute them over a wide area, playing with colour and transparency.
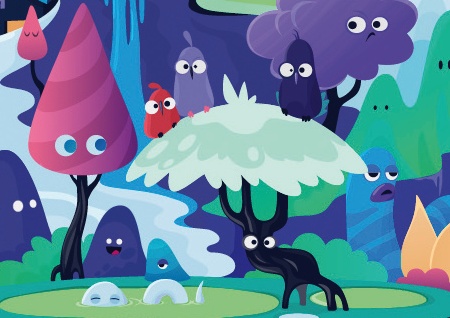
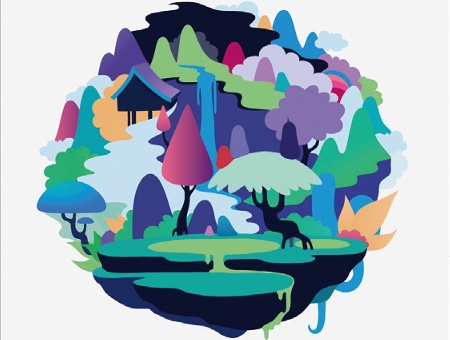
10 You can turn even the tiniest element in your image into a character. It might not be visible at first sight, but it will bring more complexity and life into your piece. Try to emphasise distinctive features of your creations – features they might have in the real world. Also, if there's a liquid in your image, now is the time to add reflections and highlights; if you have a textured surface like bark on a tree, try to express it.
11 Add some final touches, such as tiny insects, blades of grass or surface highlights, for instance. It's important not to overdo it at this point, as too much detail can kill the initial idea. Make sure your composition is balanced, and you're done.
Zutto.
Russia-based Zutto is a freelance illustrator. Inspired by nature, her work features vibrant colours and strange creatures.
www.zuttoworld.com
Related articles
How To Create My Own Character
Source: https://www.creativebloq.com/create-abstract-characters-8114299
Posted by: stewartfortalwyneho.blogspot.com
0 Response to "How To Create My Own Character"
Post a Comment