

How To Draw A Grasshopper Easy Step By Step
There are many dissimilar insects in the animal kingdom, and many of them have some weird and wonderful designs!
The grasshopper stands out even amidst this broad variety of dissimilar kinds, and it distinguishes itself even more with its incredible jumping power.
This unique advent also makes information technology a favorite insect effectually the world, leading many to desire to learn how to depict a grasshopper.
If you lot are ane of these people and so you came to the right place!
This pace-past-stride guide on how to draw a grasshopper in 6 steps volition let you have a great fourth dimension as yous draw this incredible creature.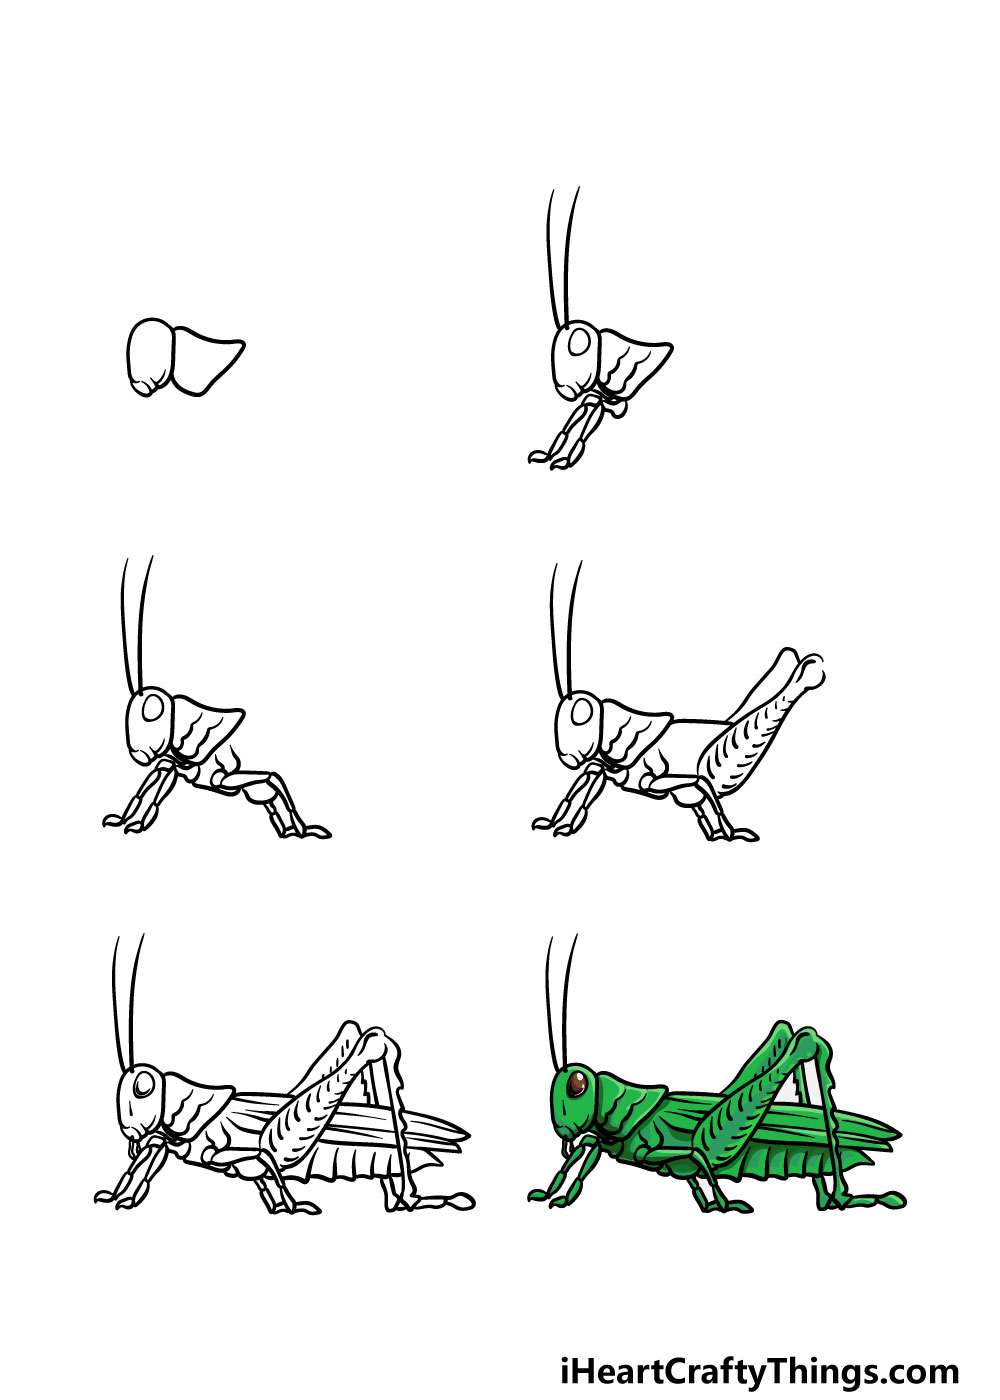
What's in this Blog Postal service
- How to Draw A Grasshopper – Let's Go Started!
- Step ane
- Step 2 – Start adding some details to the head and thorax
- Footstep 3 – At present, draw the next legs
- Stride four – Next, draw the big dorsum legs
- Step five – Now, you lot can terminate off the final details and elements
- Pace 6 – Finish off your grasshopper drawing with some color
- Your Grasshopper Cartoon is Complete!
How to Draw A Grasshopper – Let's Go Started!
Step 1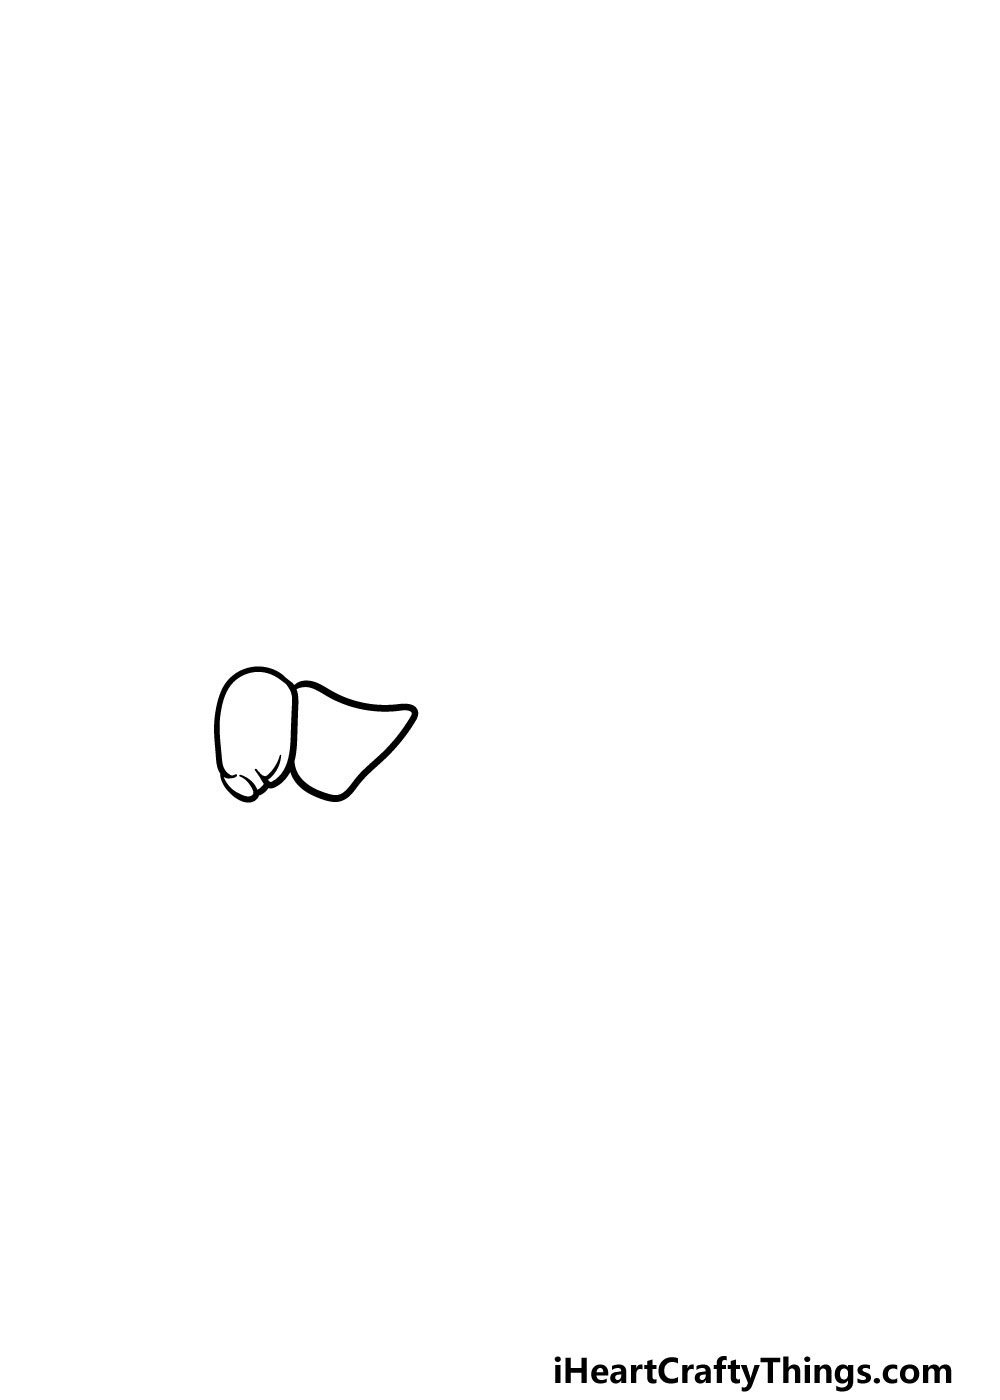
For this first step of our guide on how to draw a grasshopper, we will be starting with the head and thorax of the insect.
To draw the head, you will be drawing a rounded shape with a small shape at the bottom of it. Then, you tin can depict another shape to the right of the head.
This will also be drawn with some rounded lines, merely it will likewise have a sharp protrusion at the top right-hand side.
Once you have these elements looking as they do in the reference image then you're ready for the next step!
Step 2 – Outset calculation some details to the head and thorax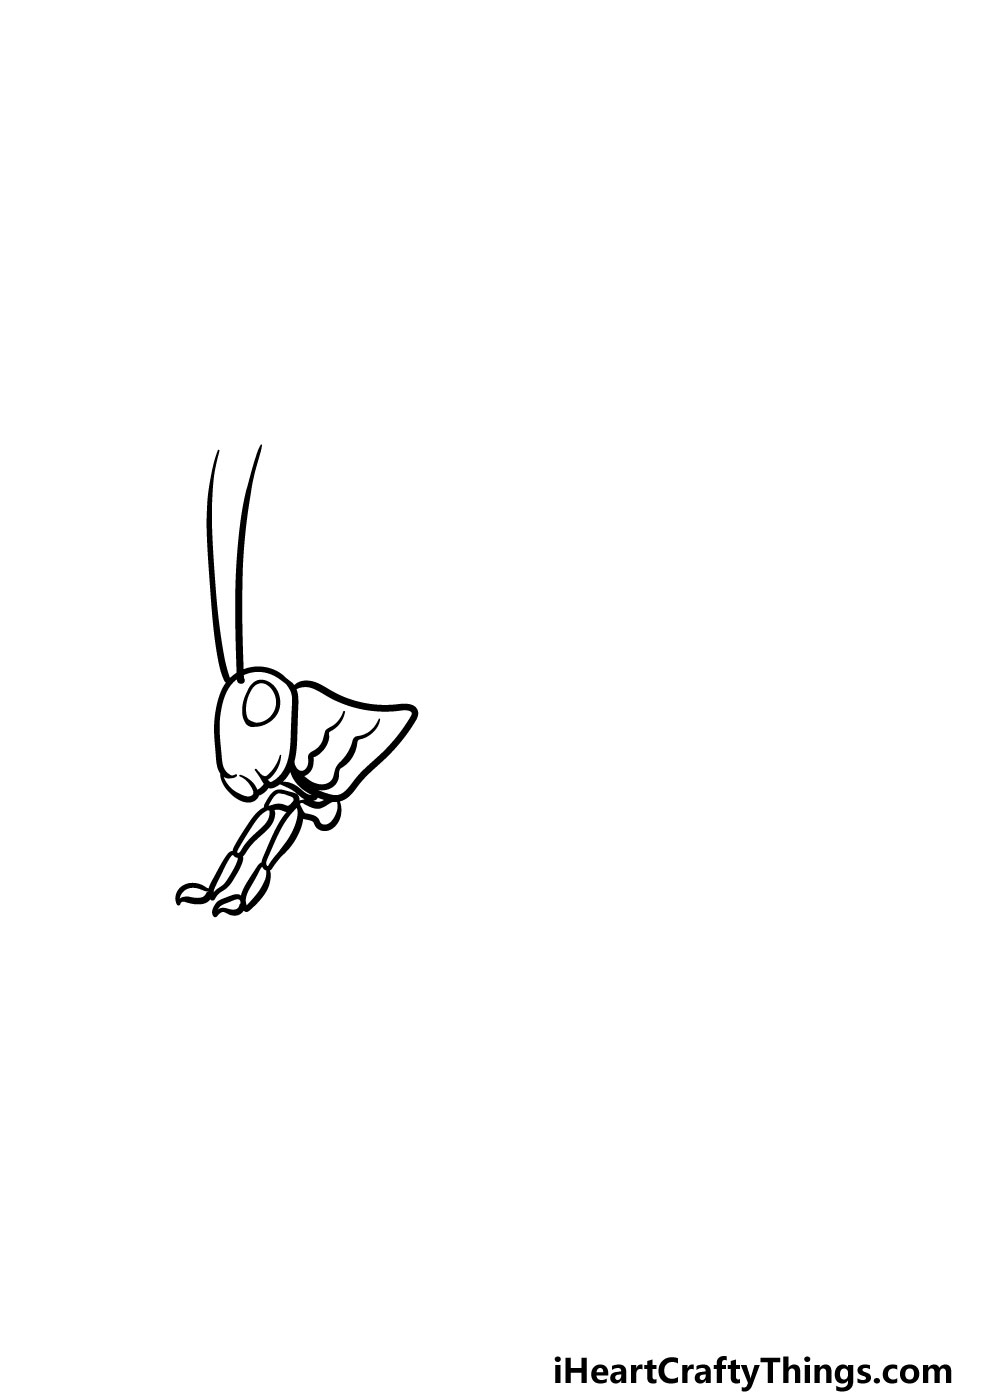
At present that yous have the head and thorax drawn, nosotros can first to add some details to them. For the head, you can draw an oval shape for the eye of the grasshopper.
Then, you tin use some long lines poking off of information technology for the feelers. Every bit for the thorax, nosotros will be calculation some wavy lines to it for some texture detail.
Finally for this pace, nosotros will be adding the two front end legs. These legs will have three sections each, as shown in the reference image. That's all there is to it for this step and you're set for step 3!
Step three – Now, depict the adjacent legs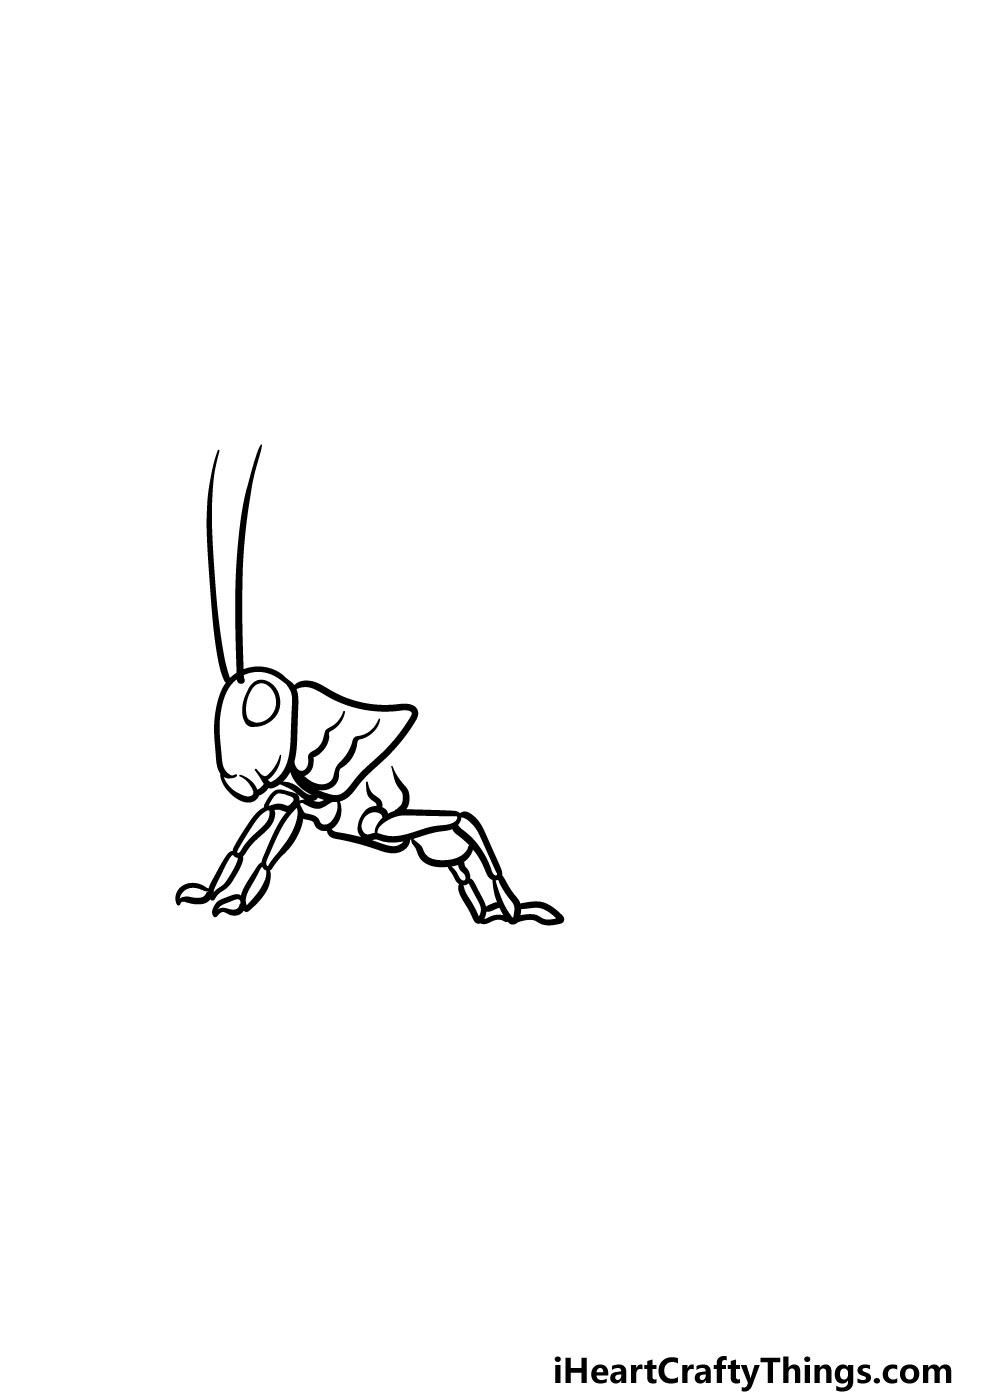
It'due south fourth dimension to add together more legs in this stride of our guide on how to draw a grasshopper! These ones volition look very similar to the previous ones that you drew but will have a few differences.
First, the acme segment of the leg will be longer than information technology was for the first one.
Also, these ones will point towards the back of the grasshopper instead of to the front as the other ones did.
Step iv – Adjacent, describe the big back legs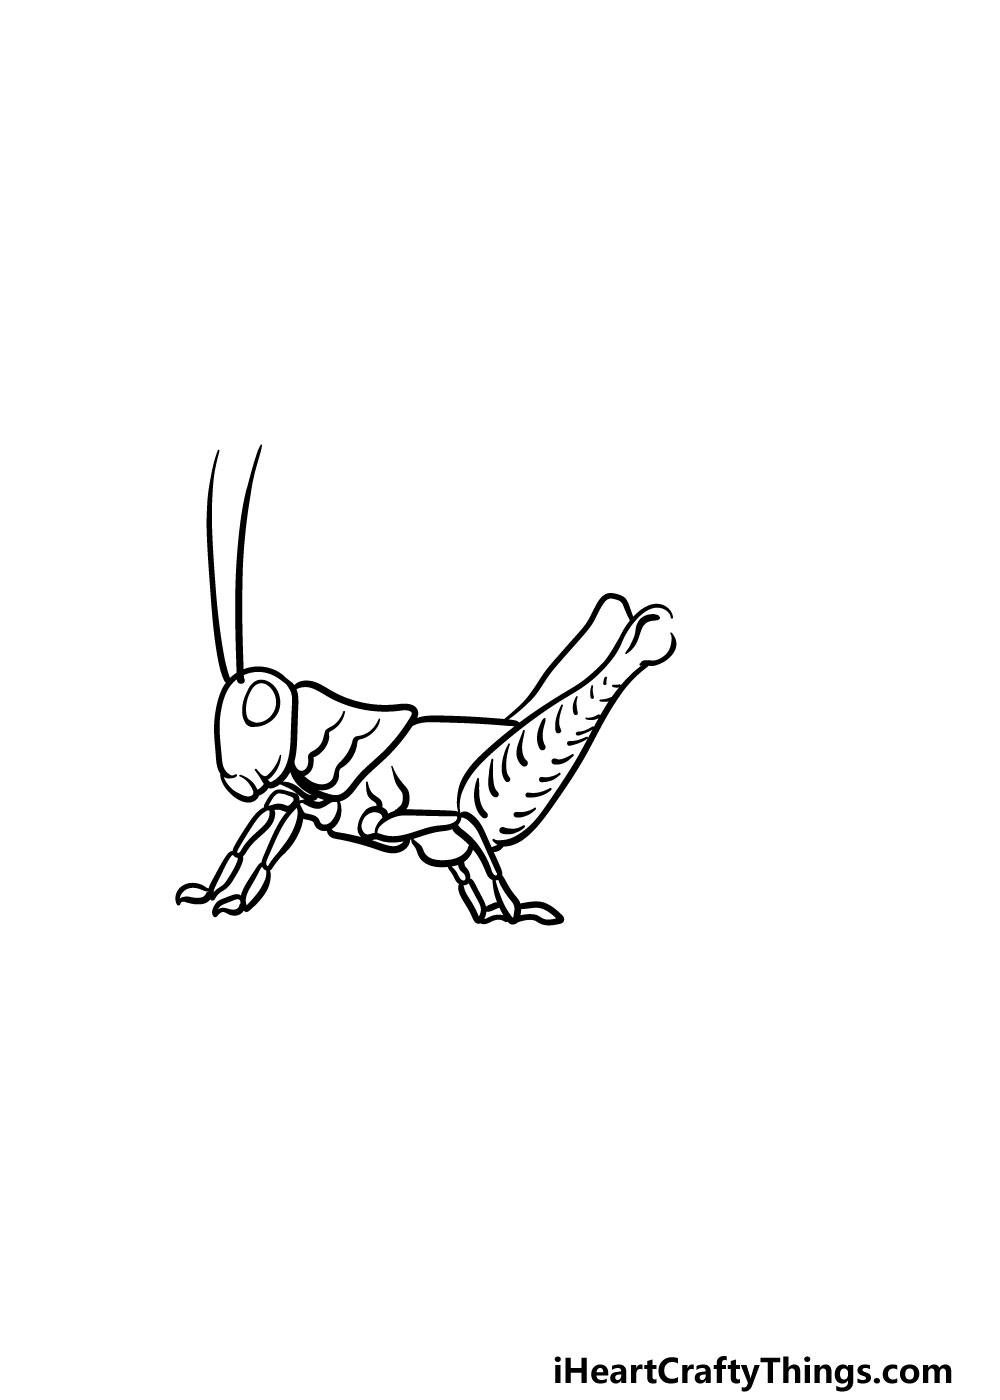
Ii of the grasshopper's legs are big and powerful to assistance them leap far and high. These are what we volition commencement drawing in this part of your grasshopper drawing.
These legs are thick and rounded at the base, but they will get thinner the further along they go. They will also end in a round, knobbly shape that will connect to the residue of the leg later.
Finally, you tin draw a series of brusk, straight lines along the leg for some extra detail.
Step 5 – At present, you can finish off the concluding details and elements
Earlier you movement on to the final step of this guide on how to depict a grasshopper, we have a few more than additions to piece of work on beginning.
Beginning, utilize some jagged lines to create the sparse bottom section of the back leg, as it's shown in the reference image.
Then, you tin extend the wings backward by using some more straight lines. Finally, the belly will be drawn with some more than jagged lines.
Then, information technology's merely a thing of using some unproblematic lines for more than particular throughout the grasshopper. These tin go on the optics, face, trunk, wings and legs.
These are merely the details that we would add together, and y'all should experience free to add together any more that you may want to!
You lot could also draw a background or add even more insects to go along with this grasshopper. Be sure to get creative and see what happens!
Step six – Finish off your grasshopper drawing with some colour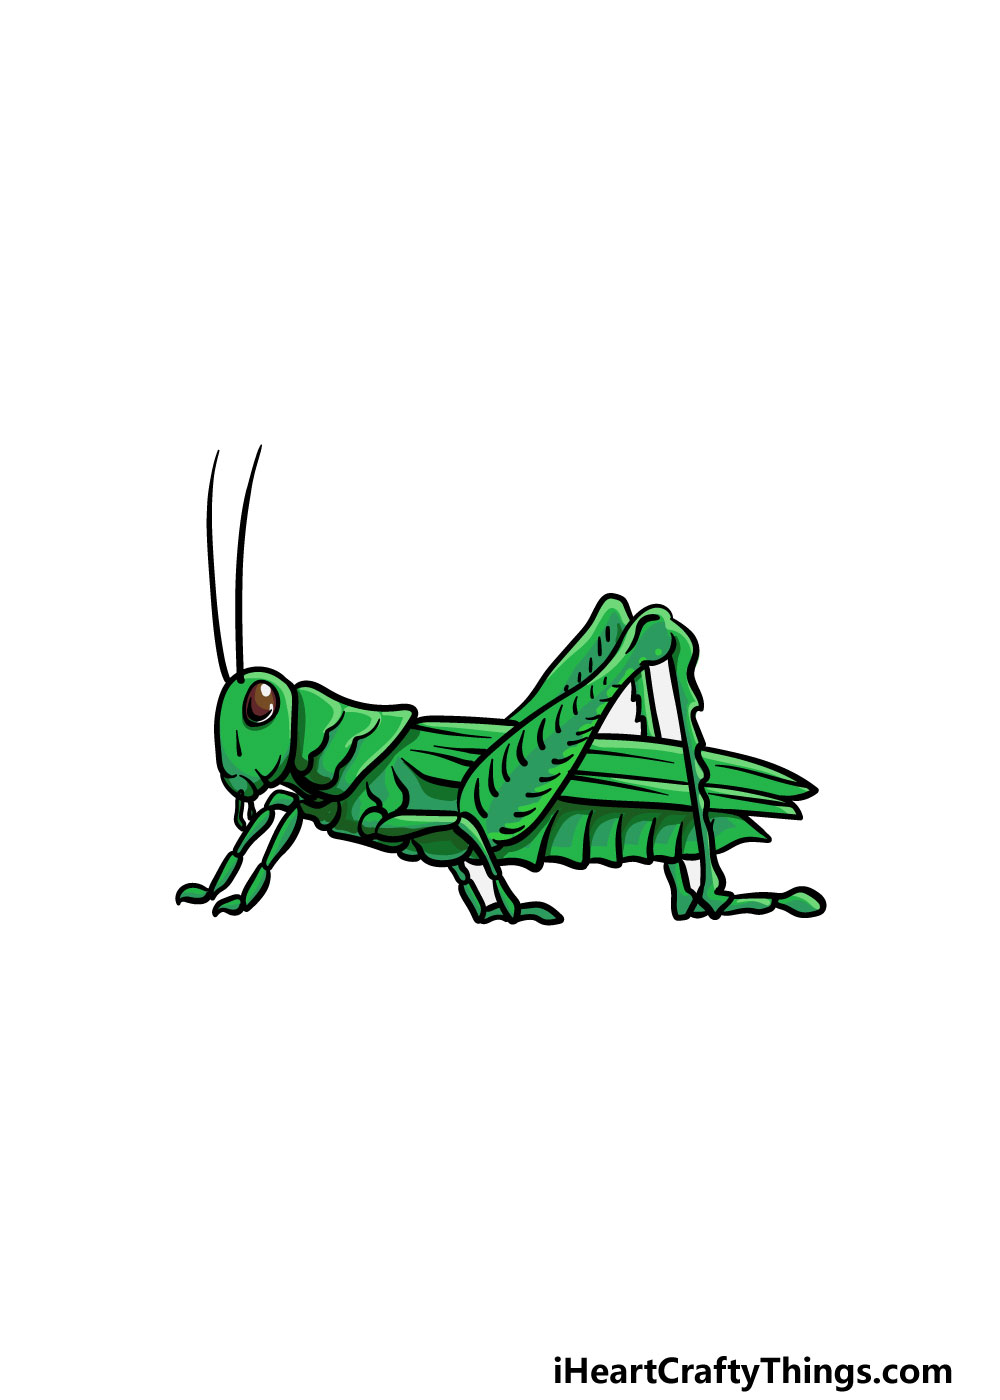
You have reached the sixth and terminal footstep of this grasshopper cartoon, and this is the one where you get to have some fun coloring it in!
For our reference image we went with a bright green color scheme, only this is just one fashion that you could colour in your image.
While you could replicate our color choice, you lot can also utilize any other colors that you may dear. Grasshoppers come in many different colors and patterns, and so that gives you lot a lot of freedom with how you lot can bring this drawing to life.
There are many different art mediums to choose from depending on what kind of look you want for this pic.
Brighter colors can be accomplished with mediums similar acrylic paints, colored pens and markers. More than muted colors can exist achieved with ones similar watercolors, colored pencils or crayons.
In that location are so many incredible options at your disposal, so be sure to have fun with information technology!
Which colors and art mediums will you lot use to end off this picture?
Your Grasshopper Cartoon is Complete!
That brings you to the very end of this guide on how to draw a grasshopper! We actually hope that you lot had a lot of fun working with us on this guide.
We created this guide to brand this drawing much easier for you to take on, as it always helps to intermission a new cartoon downwards into smaller more manageable steps.
Finishing this guide is simply the start of the fun, withal! You can have it fifty-fifty farther by calculation your own touches and details.
These could include a wonderful background, some extra texture details, more insects or anything else you lot tin can think of!
You tin also achieve some amazing color variation depending on the shades and mediums that you choose to end it off.
There'south some good news for yous if you enjoyed this guide, as we accept many more similar it on our website for y'all to enjoy.
We upload new ones oft as well, then check in often to take hold of each new guide as it comes out!
One time your grasshopper drawing is complete, we would really love to encounter information technology! We promise that yous volition share it on our Facebook and Pinterest pages for usa to bask.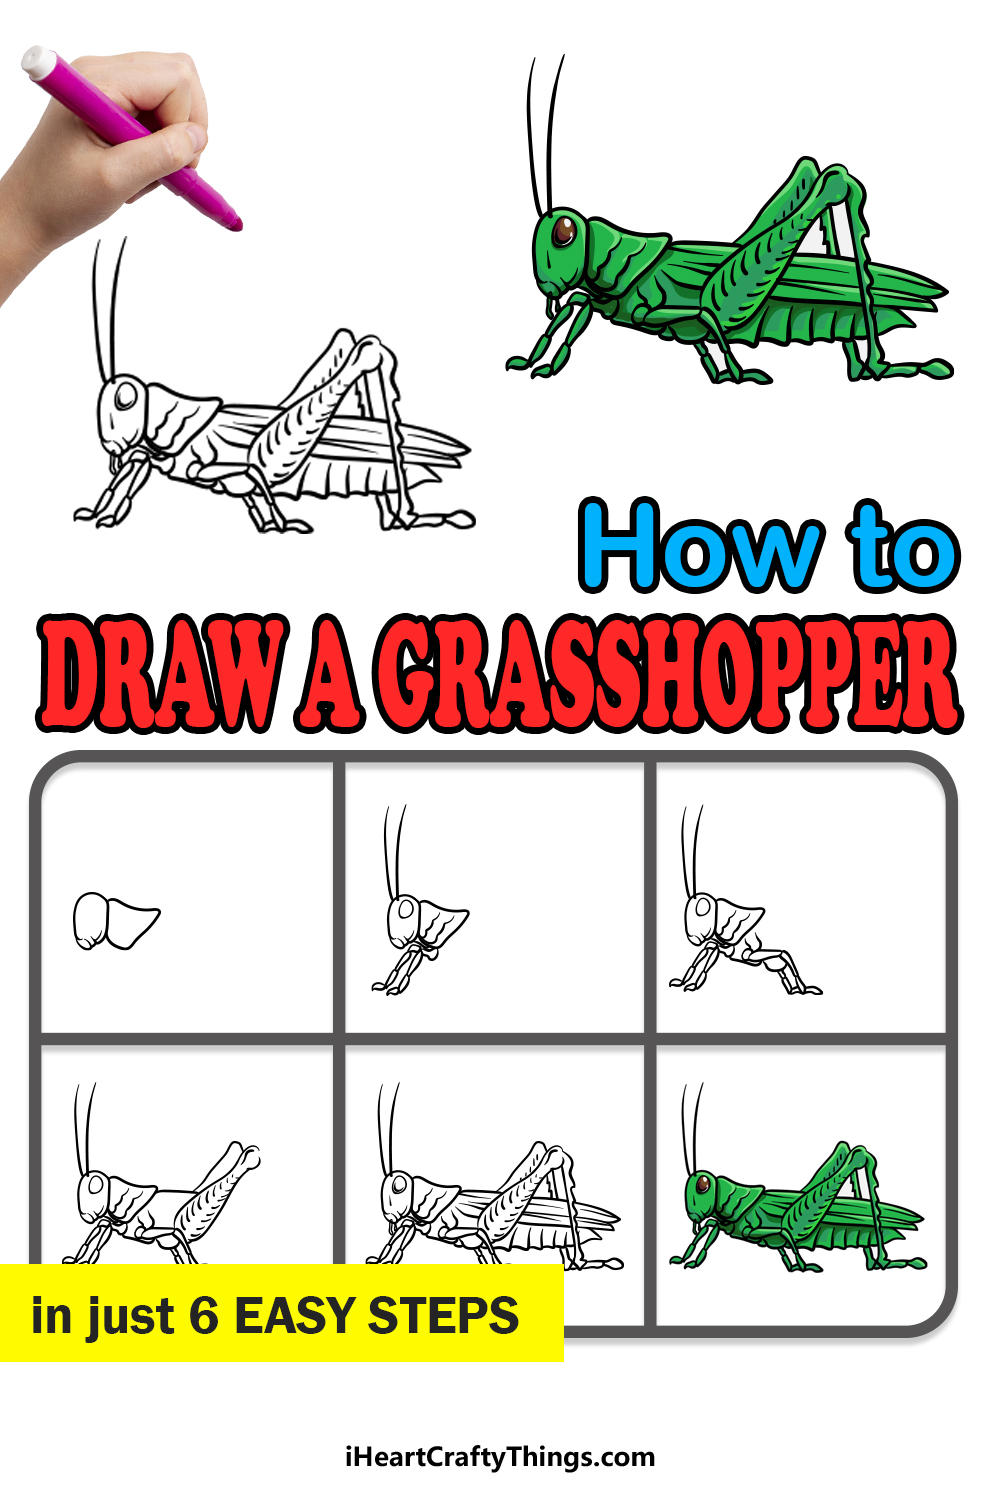

Source: https://iheartcraftythings.com/grasshopper-drawing.html
Posted by: stewartfortalwyneho.blogspot.com
0 Response to "How To Draw A Grasshopper Easy Step By Step"
Post a Comment